Install Multiple Java Versions on Mac
Mon Dec 7, 2015

During one of AWS Lambda exploration projects, I need to use Amazon’s swagger-import-tool for uploading swagger documents to AWS. The problem is that this tool has a dependency on Java 8, however, my installed JDK is 7, and I have to keep it for all existing Java projects. It seems that I need to have something like NVM (Node Version Manager) … this time for JDKs.
After some Google searches, a promising solution is to use jEnv – a command line tool to set JAVA_HOME on the fly.
Homebrew Cask
On Mac, Homebrew is the de-facto package manager, and Homebrew Cask is the app manager. I’m going to use Cask to install Java 7 and 8.
Install Homebrew Cask first if you haven’t:
brew update
brew tap caskroom/cask
brew install brew-cask
If your brew or cask is outdated, update and upgrade:
brew update && brew upgrade brew-cask && brew cleanup && brew cask cleanup
Install Java 7 and 8
People on the Stackoverflow cautioned not to install 8 until 7 is installed. So we are going to install JDK 7 first.
Unlike other version managers such as NVM, jEnv itself doesn’t install JDKs. You have to do it yourself. Luckily, Homebrew Cask made this task really easy. But before doing that, let’s check if we already have JDK 7 installed by Homebrew Cask:
brew tap caskroom/versions
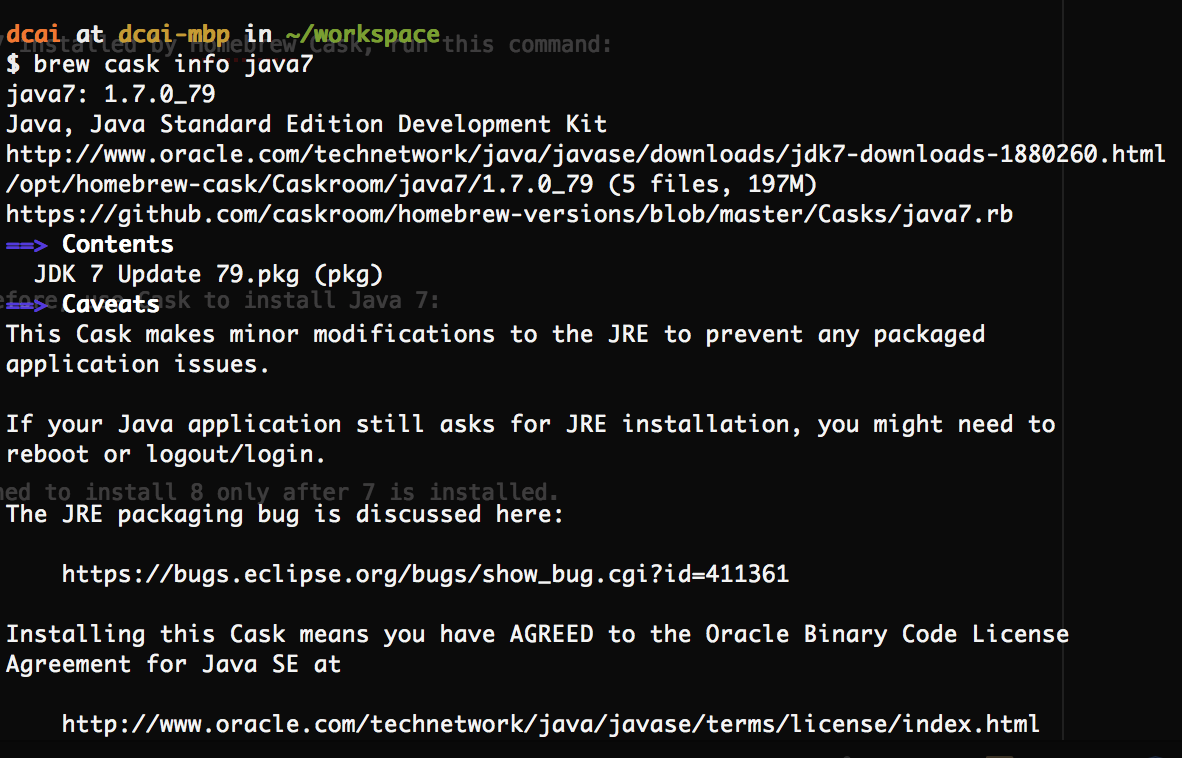
brew cask info java7
If Java 7 is installed, you should see something like this:
Otherwise, install Java 7:
brew cask install java7
If you run into permission issue, add sudo at the beginning of the above command.
As of today, Java 8 is the latest stable. Run the following command to install Java 8:
brew cask install java
These two JDKs will be installed at the following directories. Your JDKs’ minor and patch versions might be different.
/Library/Java/JavaVirtualMachines/jdk1.7.0_79.jdk/Contents/Home/
/Library/Java/JavaVirtualMachines/jdk1.8.0_66.jdk/Contents/Home/
Enter jEnv
Now it is time to install jEnv:
brew install jenv
Add the following lines to ~/.bash_profile. This will initialize jEnv.
# Init jenv
if which jenv > /dev/null; then eval "$(jenv init -)"; fi
jEnv doesn’t install JDKs, so we have to tell jEnv where to look for them. Type these commands to register JDKs in jEnv (replace the minor and patch versions with yours):
jenv add /Library/Java/JavaVirtualMachines/jdk1.7.0_79.jdk/Contents/Home/
jenv add /Library/Java/JavaVirtualMachines/jdk1.8.0_66.jdk/Contents/Home/
After that, run this command to list all registered JDKs:
jenv versions
The output will be something like this:
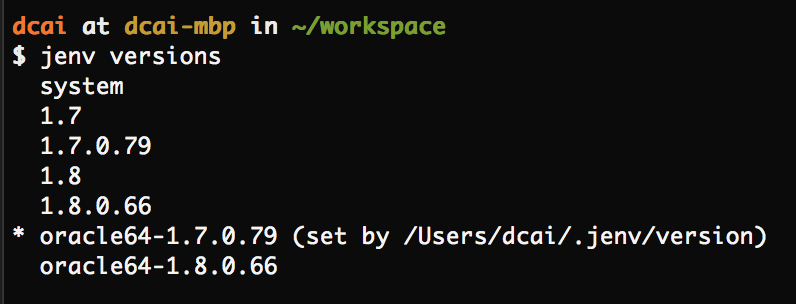
The version with an asterisk is the active version.
In my case, I need to keep JDK 7 as my default version, so I set the global version to 1.7:
jenv global oracle64-1.7.0.79
And in my project, I set the local JDK version to 1.8:
cd <my project>
jenv local oracle64-1.8.0.66
The above command will create a .java-version file at project root. Its content is the version I just picked for this project:
oracle64-1.8.0.66
References
To learn more about jEnv, here I list some references:
- jEnv official site
- The Stackoverflow thread
- Andrew John’s blog post